
Most people only think about a backup after the phone is lost, cracked or stuck on an update. Dr.Fone (the Dr.Fone Basic plan for Windows) backs up an iPhone, iPad or iPod touch to your own computer, lets you schedule the backup over Wi-Fi, and restores only the data you choose to an iOS or Android device. This guide follows the official Dr.Fone flow: a manual backup first, then automatic backups, a selective restore and an export to your PC.
Disclosure: this guide contains affiliate links (Awin). If you buy through them we may earn a commission at no extra cost to you. Specs come from the official product page.
What you need
- A Windows PC with Dr.Fone installed (Dr.Fone Basic, or the Full Toolkit, which includes it) and an internet connection for the first setup
- Your iPhone, iPad or iPod touch, unlocked, and a working USB cable
- Enough free disk space on the computer for the backup, which grows with photos, videos and app data
- For automatic backups: the iPhone and the computer on the same Wi-Fi network
Step 1: Back Up Now to your computer
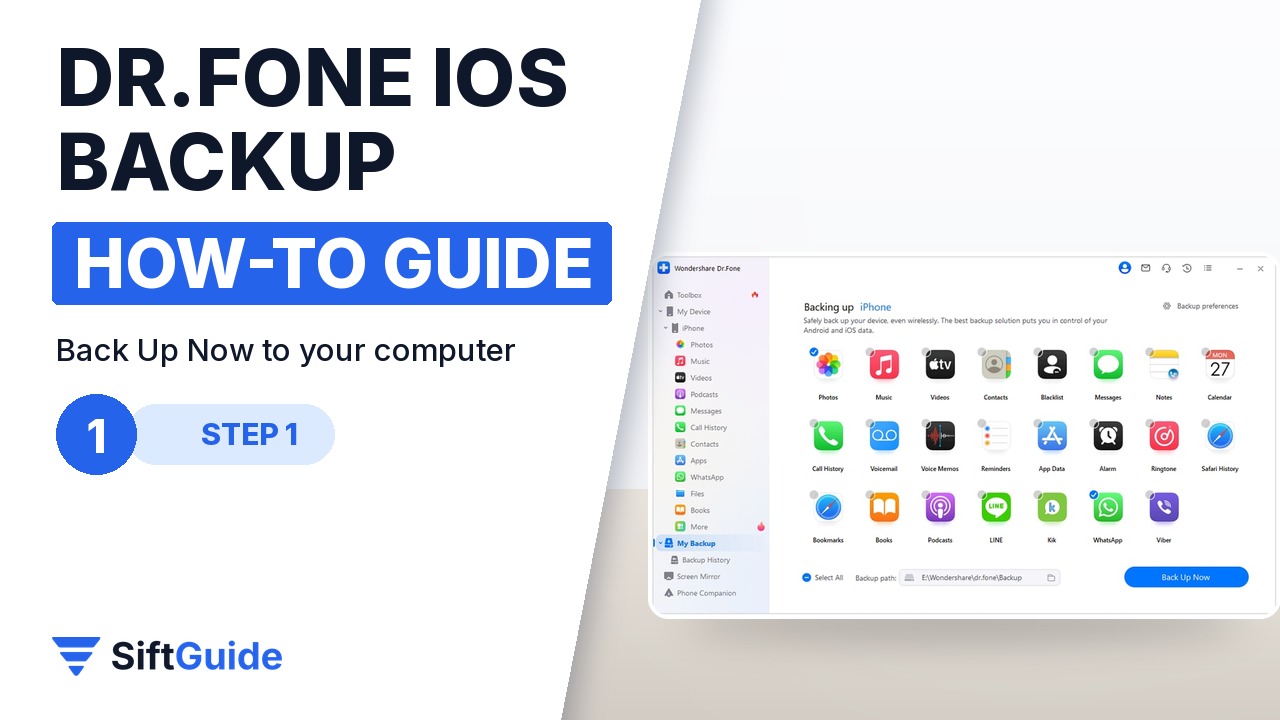
Connect the iPhone to the computer, launch Dr.Fone and open the My Backup section in the left panel. Click Back Up Now to start backing up the device to your PC. According to Wondershare, Dr.Fone can back up 26 types of iOS data, including photos, music, videos, messages, WhatsApp, LINE, Viber and Kik chats, call history, voicemail, reminders, Safari data, calendar, contacts, notes, voice memos, app data, wallpaper and the alarm list. You can also choose to back up only selected data types instead of everything.
Step 2: See what was saved
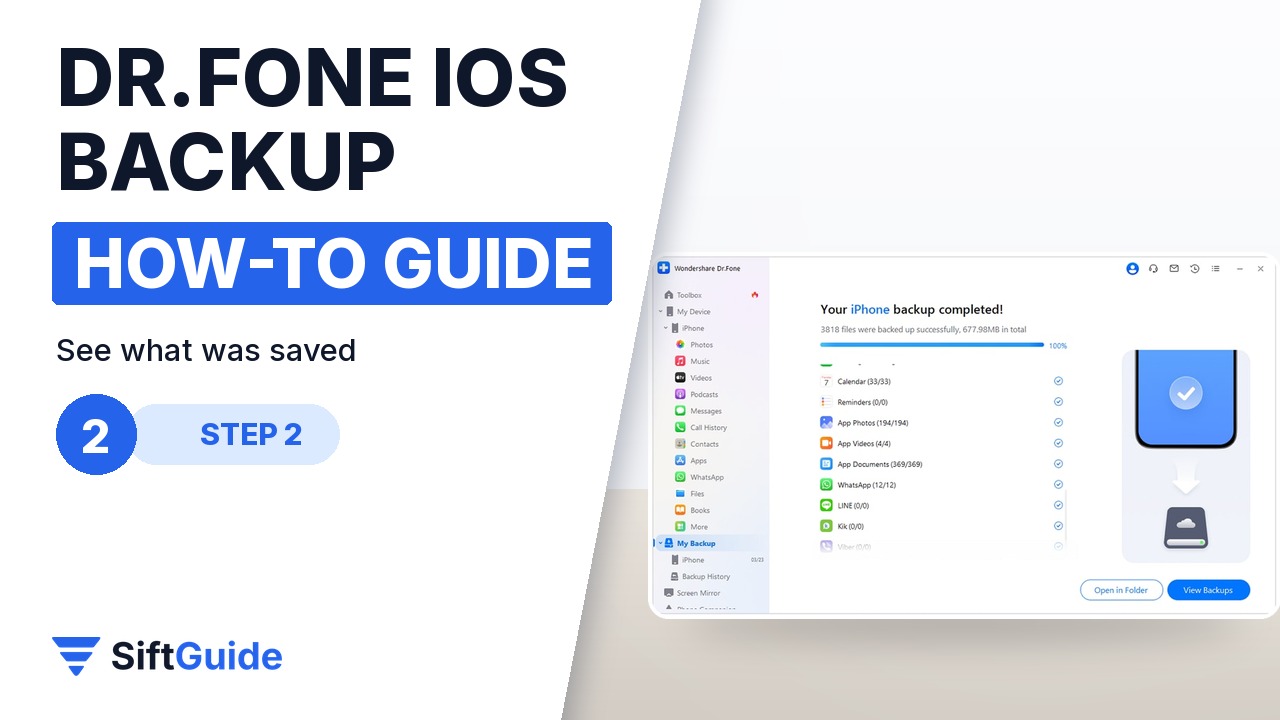
Dr.Fone detects the file types on the device and backs them up automatically; wait until the process completes, and use Cancel only if you really need to stop it. When it finishes, the window shows the backup details. Click View Backups to browse the backups made with Dr.Fone, or Open in Folder to jump to the folder on your computer that holds them. Wondershare notes that the Mac version still uses an older interface, but the function works the same way.
Step 3: Automatic backups over Wi-Fi
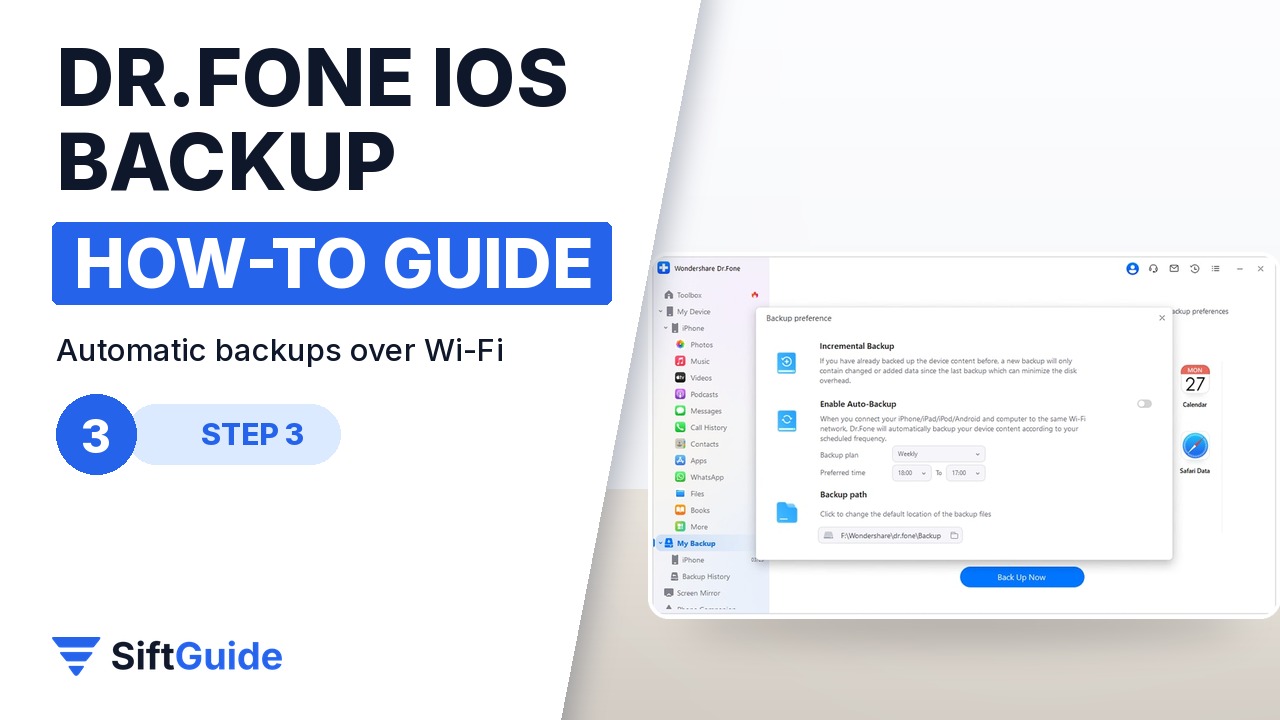
To stop doing it by hand, open My Devices, then Backup preferences. Switch on Enable Auto-Backup, make sure the iPhone and the computer are connected to the same network, and set the Backup Plan and the Preferred Time. From then on the device backs up on schedule, and Backup History lists every backup, with a View button to check what is inside each one by category. Wondershare describes the backups as incremental: each new backup adds only what has changed.
Step 4: Restore only what you need
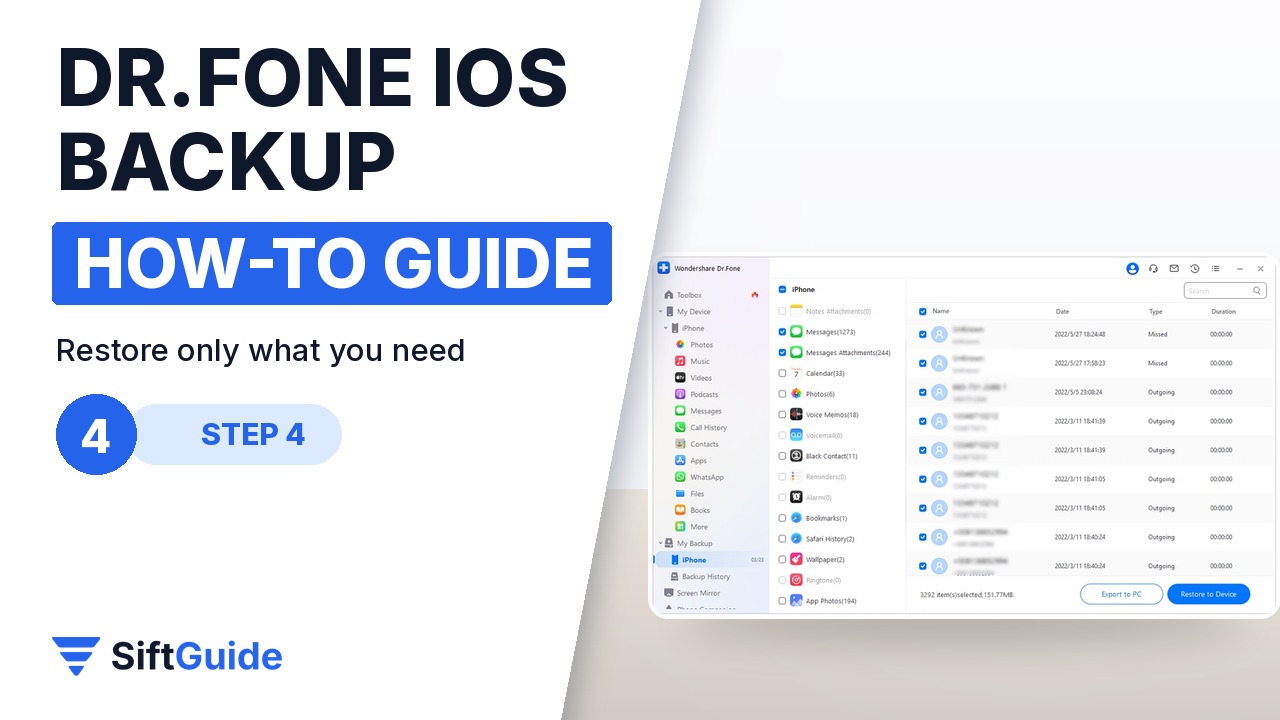
Open Backup History, choose a backup and click View. Click a file type, for example call history, and tick the specific items you want back, then click Restore to Device. A window lists the file types that will be restored and those that cannot be, so you know what to expect; click Continue and watch the progress bar, then click Done. Wondershare says the restore can be selective and does not overwrite the existing data on the device, and that Dr.Fone can restore iTunes, iCloud or Dr.Fone backups to an iOS or an Android device.
Step 5: Export a backup to your PC
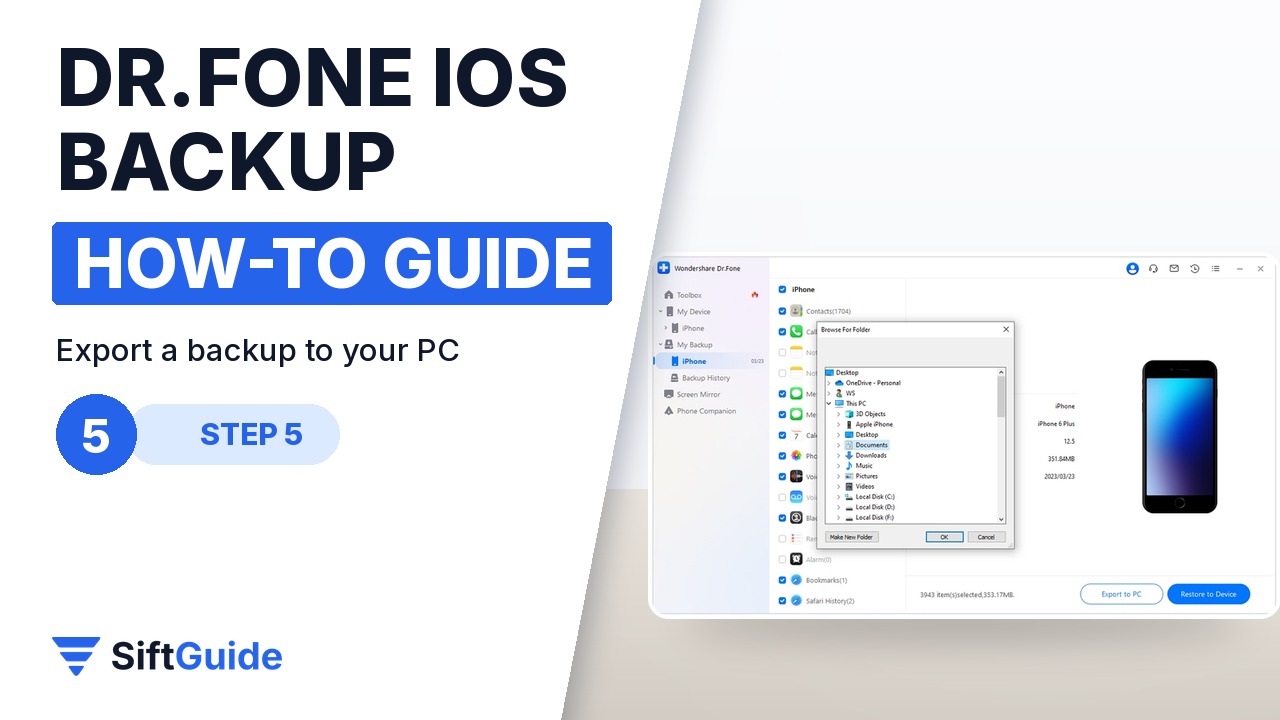
You can also pull a backup out of Dr.Fone as readable files. Select the file types you want to export and click Export to PC, browse to the folder where the files should go, and wait for the progress bar to finish; click Cancel if you change your mind. Wondershare lists selective export, full backup content preview and custom destination paths for this feature, which is handy for photos or chats you want to keep outside the backup itself.
Tip: back up before you update or switch phones
Run a manual backup before an iOS update, a repair or a phone change, then check Backup History to confirm the new backup appears. A scheduled Wi-Fi backup covers the everyday case, but a backup you just verified is the one you will be glad to have.
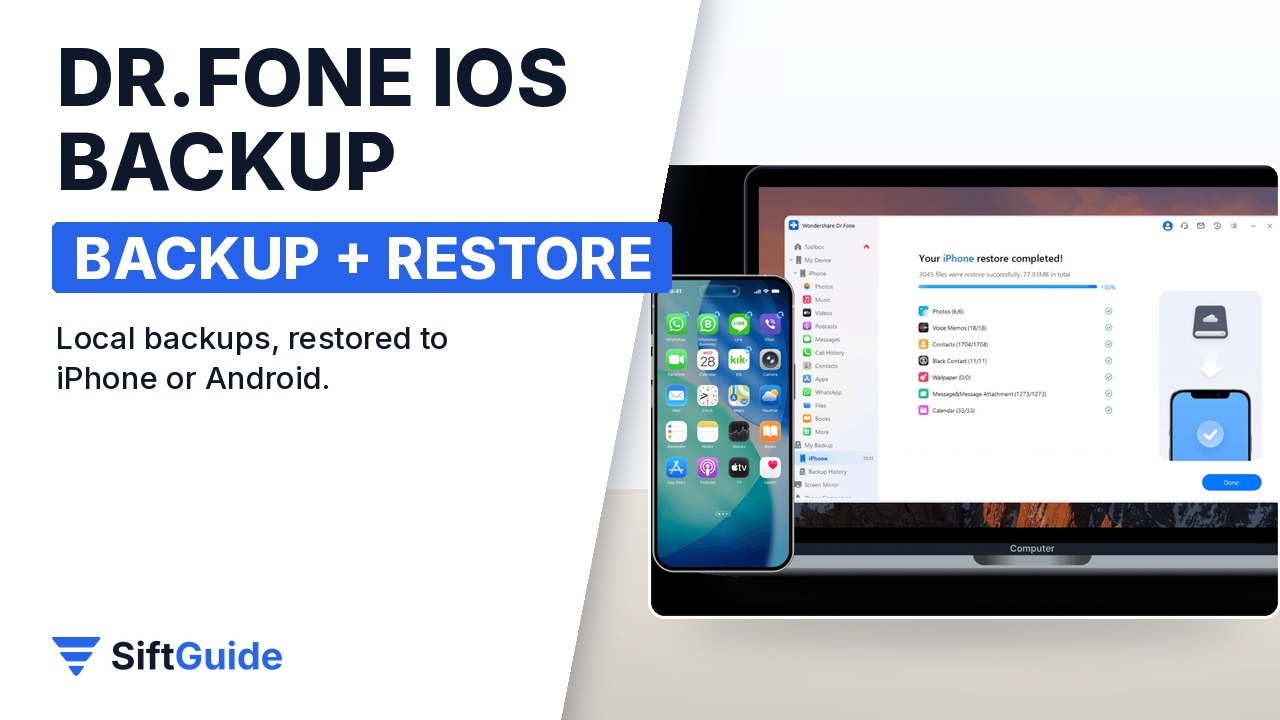
Set up this way, your iPhone data lives in a second place you control: a local backup on your Windows PC, refreshed automatically over Wi-Fi, restorable item by item to an iPhone or Android phone, and exportable as files. Wondershare also lists social app backup for WhatsApp, LINE, Kik and Viber, with preview and search of chats after the backup.
Wondershare Dr.Fone Basic (iOS Backup & Restore) for Windows
Backs up and restores iPhone, iPad and iPod touch data on your own PC, with manual and scheduled Wi-Fi backups, incremental backups, selective restore without overwriting existing data, restore to iOS or Android, and export to PC; it also manages data across iOS and Android and mirrors the screen. Price checked on the official Wondershare store on 9 November 2026 for Windows: $29.95 per month, $39.95 per year or $49.95 perpetual (5 devices / 2 PCs; the annual plan renews automatically). Prices change, so check the store before you buy.
FAQ
Does Dr.Fone back up my iPhone to the cloud?
No. The backups are stored locally on your Windows PC or Mac, which Wondershare presents as the private alternative to the cloud.
Can I restore just one thing, like call history?
Yes. After you open a backup with View, you pick a file type, tick the specific items and click Restore to Device. Wondershare says this does not overwrite the existing data on the device.
Do I need a cable for automatic backups?
No. For auto-backup the iPhone and the computer only need to be on the same Wi-Fi network, with the backup plan and preferred time set in Backup preferences.
Can I restore an iPhone backup to an Android phone?
Wondershare states that iOS backups, including iTunes and iCloud backups, can be restored to an iOS or an Android device with Dr.Fone.
What if the backup stops?
The process can be cancelled from the progress window. Start again with Back Up Now, then use Backup History to confirm the backup was saved.
Is there a free trial?
Dr.Fone is free to download so you can try the available features; Wondershare also advertises a 7-day trial of Dr.Fone Basic. Check the current offer on the official page.